How to Route Webstudio Form Submissions to One or Multiple Emails Using Cloudflare Workers and Resend
•
8 mins read
by Mark Sagang

Webstudio’s native form email setting is useful, but it usually sends form submissions to one project-level email address. That can be limiting when you want a specific form to go to a different inbox, multiple inboxes, or a custom-formatted email.
This setup uses a Webstudio Webhook Form, a Cloudflare Worker, and Resend.
Webstudio Webhook Form
→ Cloudflare Worker
→ Resend
→ One or multiple target inboxes
Use this approach when you want more control over where submissions go and how the email is formatted.
When This Setup Is Useful
Use this setup when you need to:
- Send one form to a different email address
- Forward submissions to multiple recipients
- Customize the email subject, sender name, and body format
- Set the visitor’s email as the Reply-To address
- Avoid changing your domain’s existing email receiving setup
Example:
General contact form → [email protected]
Quote request form → [email protected]
Quote request form copy → [email protected]
This is useful for forms tied to different departments, locations, services, or lead types.
First, Check If Cloudflare Email Routing Is Enough
This setup is not always necessary.
If you only need to create a custom email address and forward incoming emails to another inbox, Cloudflare Email Routing may be the simpler option.
Example:
[email protected]
→ forwarded to [email protected]
Cloudflare has documentation for that here:
Cloudflare Email Routing documentation
However, Cloudflare Email Routing is for receiving and forwarding inbound email. It also requires Cloudflare to manage the email routing records for the domain.
In my specific case, the client’s domain email was already being handled by Google Workspace. Enabling Cloudflare Email Routing would have required changing or deleting existing MX records, which could affect normal email receiving.
That is why this setup uses Resend and Cloudflare Workers instead.
Google Workspace = keeps receiving normal business email
Cloudflare Worker = receives the Webstudio form submission
Resend = sends the formatted notification email
What You Need
Before starting, you need:
- A Webstudio Webhook Form
- A Cloudflare Worker
- A Resend account
- A verified Resend sending domain or subdomain
- One or more target inboxes for form submissions
Recommended sender setup:
Sending subdomain: send.example.com
Sender email: [email protected]
Using a sending subdomain helps keep form emails separate from your main business email setup.
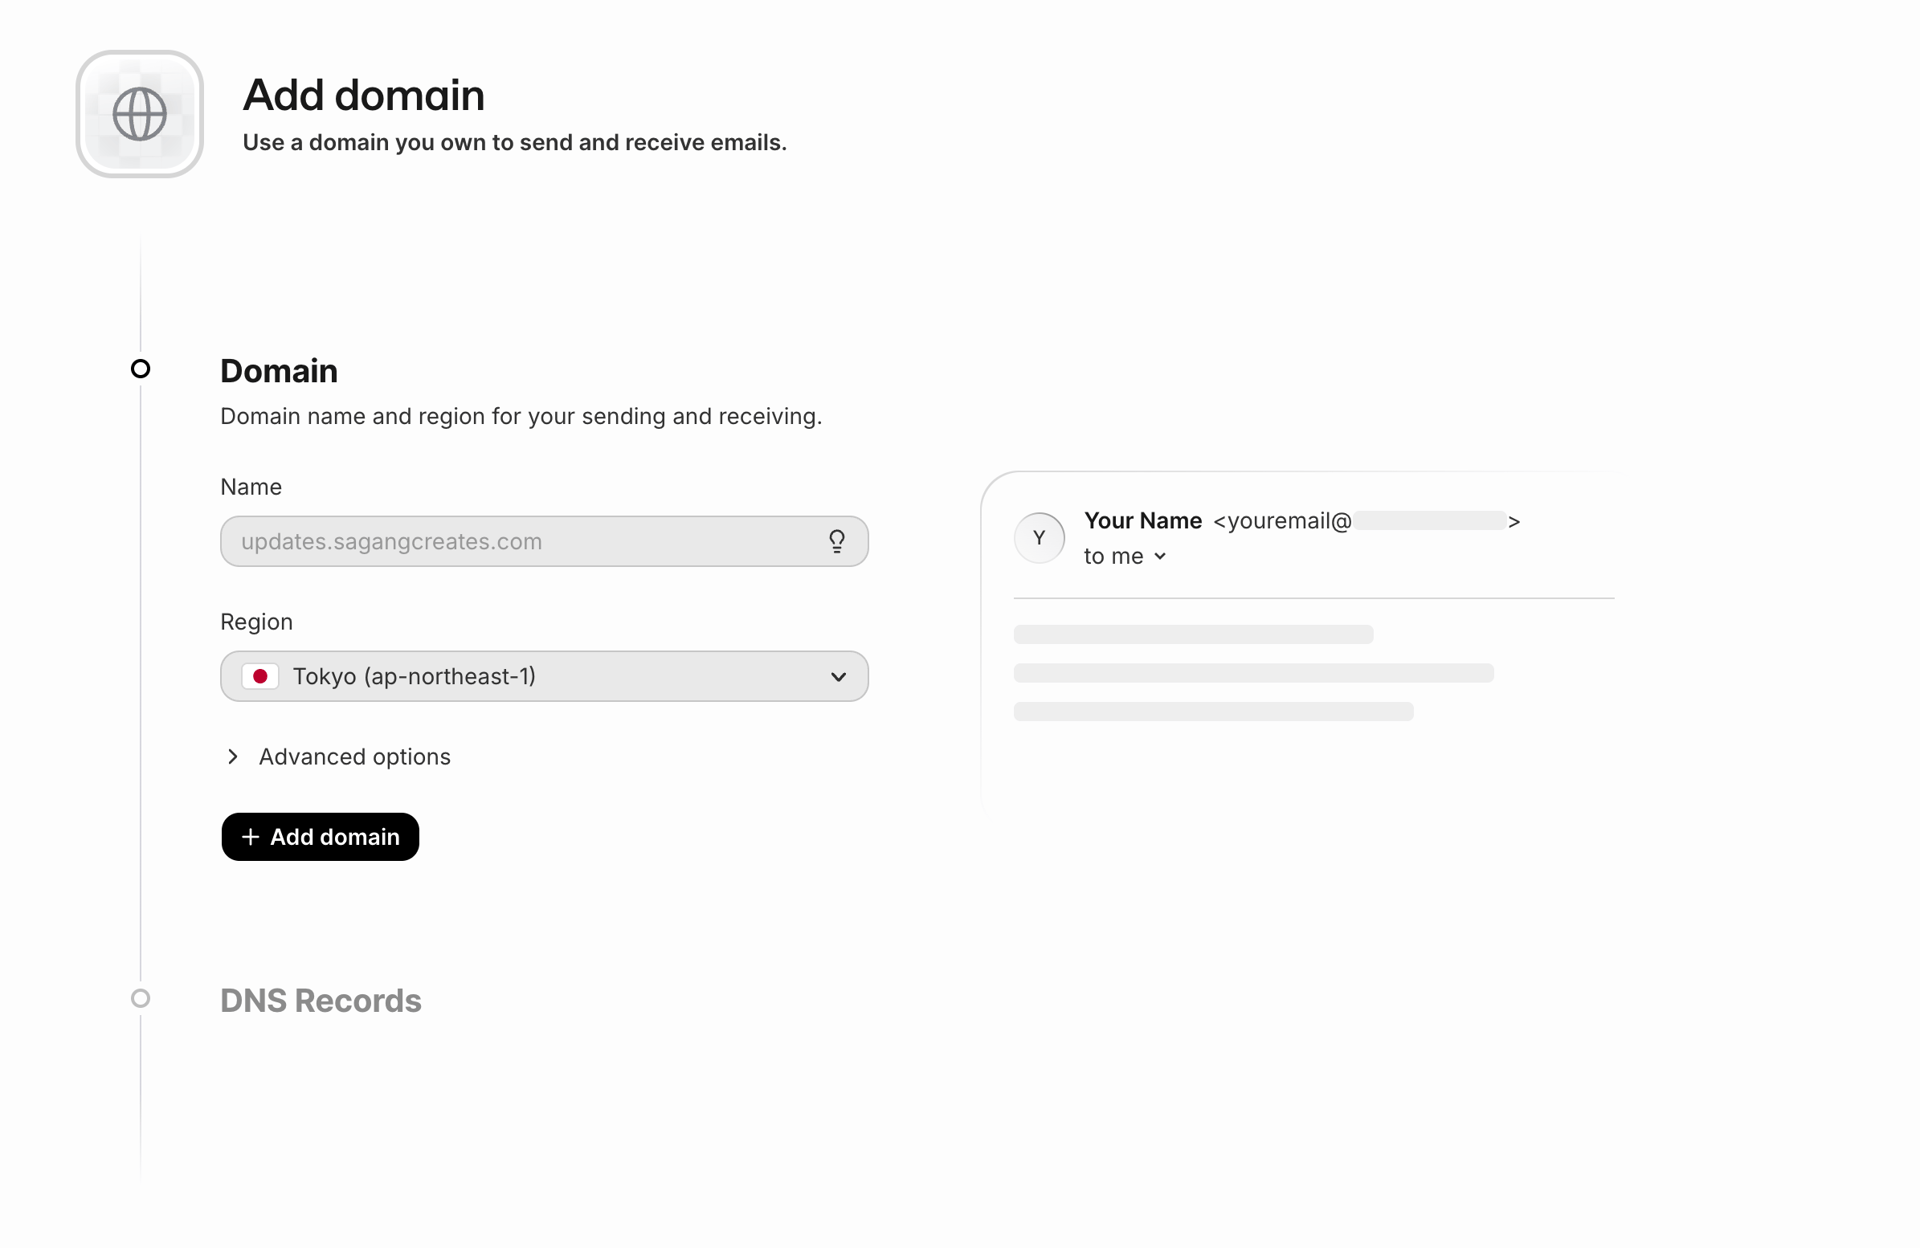
Step 1: Verify Your Sending Domain in Resend
In Resend, add a sending domain or subdomain.
Example:
send.example.com
Then copy the DNS records Resend provides and add them to your DNS provider, such as Cloudflare.
Make sure these records are for the sending subdomain, not your root domain.
Do not replace your existing Google Workspace, Microsoft 365, or other business email MX records unless you intentionally want to change how your main email receives messages.
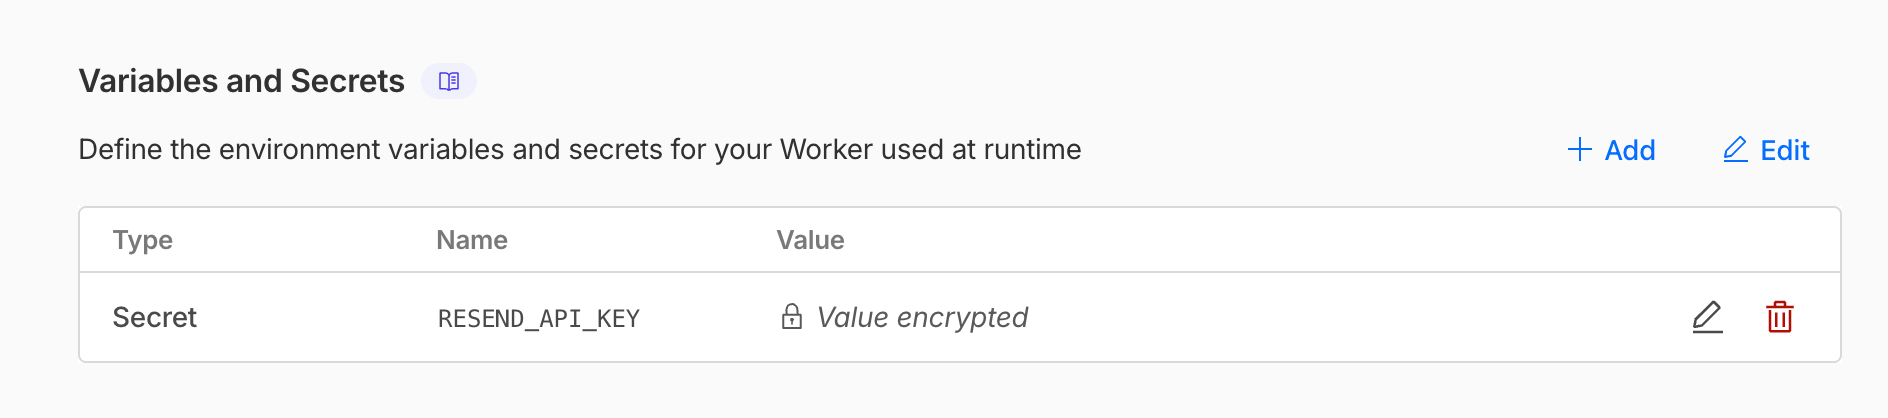
Step 2: Add Your Resend API Key to Cloudflare
In Cloudflare, add your Resend API key as a Worker secret.
Go to:
Cloudflare Dashboard
→ Workers & Pages
→ Your Worker
→ Settings
→ Variables and Secrets
→ Add
Add:
Type: Secret
Name: RESEND_API_KEY
Value: your Resend API key
Do not add the API key as a public variable.
Step 3: Add the Cloudflare Worker Code
Use this Worker code and replace the placeholder values with your own details.
const SITE_ORIGINS = [
"https://example.com",
"https://www.example.com",
];
const FROM_EMAIL = "[email protected]";
const FROM_NAME = "Website Forms";
// Testing recipient or recipients
const TO_EMAILS = ["[email protected]"];
// Later, switch to one or multiple production recipients:
// const TO_EMAILS = ["[email protected]", "[email protected]"];
export default {
async fetch(request, env) {
const origin = request.headers.get("Origin") || "";
const corsHeaders = getCorsHeaders(origin);
if (request.method === "OPTIONS") {
return new Response(null, {
status: 204,
headers: corsHeaders,
});
}
if (request.method !== "POST") {
return jsonResponse(
{ success: false, error: "Method not allowed" },
405,
corsHeaders
);
}
try {
const data = await parseSubmission(request);
// Optional honeypot spam check.
if (data.website) {
return jsonResponse({ success: true }, 200, corsHeaders);
}
const form = clean(data["Form"] || data.form || "Website Form");
const firstName = clean(data["First Name"] || data.firstName || "No first name provided");
const lastName = clean(data["Last Name"] || data.lastName || "No last name provided");
const email = clean(data["Email"] || data.email || "No email provided");
const phone = clean(data["Phone Number"] || data.phone || "No phone number provided");
const message = clean(data["Message"] || data.message || "No message provided");
const fullName = `${firstName} ${lastName}`.trim();
const subject = `New ${form} Submission - ${fullName}`;
const text = `
New ${form} Submission
Form: ${form}
First Name: ${firstName}
Last Name: ${lastName}
Email: ${email}
Phone Number: ${phone}
Message:
${message}
`.trim();
const html = `
<h2>New ${escapeHtml(form)} Submission</h2>
<p><strong>Form:</strong> ${escapeHtml(form)}</p>
<p><strong>First Name:</strong> ${escapeHtml(firstName)}</p>
<p><strong>Last Name:</strong> ${escapeHtml(lastName)}</p>
<p><strong>Email:</strong> ${escapeHtml(email)}</p>
<p><strong>Phone Number:</strong> ${escapeHtml(phone)}</p>
<hr />
<p><strong>Message:</strong></p>
<p>${escapeHtml(message).replaceAll("\n", "<br>")}</p>
`;
const resendPayload = {
from: `${FROM_NAME} <${FROM_EMAIL}>`,
to: TO_EMAILS,
subject,
html,
text,
};
if (isValidEmail(email)) {
resendPayload.reply_to = email;
}
const resendResponse = await fetch("https://api.resend.com/emails", {
method: "POST",
headers: {
Authorization: `Bearer ${env.RESEND_API_KEY}`,
"Content-Type": "application/json",
},
body: JSON.stringify(resendPayload),
});
const resendData = await safeJson(resendResponse);
if (!resendResponse.ok) {
return jsonResponse(
{ success: false, error: "Email failed to send", details: resendData },
500,
corsHeaders
);
}
return jsonResponse({ success: true, id: resendData.id }, 200, corsHeaders);
} catch (error) {
return jsonResponse(
{ success: false, error: error.message || "Something went wrong" },
500,
corsHeaders
);
}
},
};
async function parseSubmission(request) {
const contentType = request.headers.get("content-type") || "";
if (contentType.includes("application/json")) {
return await request.json();
}
const formData = await request.formData();
const data = {};
for (const [key, value] of formData.entries()) {
data[key] = typeof value === "string" ? value : value.name;
}
return data;
}
async function safeJson(response) {
try {
return await response.json();
} catch {
return {
status: response.status,
statusText: response.statusText,
};
}
}
function getCorsHeaders(origin) {
const allowedOrigin = SITE_ORIGINS.includes(origin)
? origin
: SITE_ORIGINS[0];
return {
"Access-Control-Allow-Origin": allowedOrigin,
"Access-Control-Allow-Methods": "POST, OPTIONS",
"Access-Control-Allow-Headers": "Content-Type",
"Content-Type": "application/json",
};
}
function jsonResponse(data, status = 200, headers = {}) {
return new Response(JSON.stringify(data), {
status,
headers,
});
}
function clean(value) {
return String(value).trim();
}
function escapeHtml(value) {
return String(value)
.replaceAll("&", "&")
.replaceAll("<", "<")
.replaceAll(">", ">")
.replaceAll('"', """)
.replaceAll("'", "'");
}
function isValidEmail(value) {
return /^[^\s@]+@[^\s@]+\.[^\s@]+$/.test(value);
}
Replace these values:
| Code | Replace With |
|---|---|
| https://example.com | Your live website URL |
| [email protected] | Your verified Resend sender email |
| Website Forms | Sender name shown in the inbox |
| [email protected] | Your test recipient |
| [email protected], [email protected] | Final recipient or recipients |
You can also edit the subject, text, and html sections if you want a different email format.
Step 4: Configure the Webstudio Webhook Form
In Webstudio, select the Webhook Form component and set:
Action:
https://your-worker-name.your-account.workers.dev

Enc Type:
application/x-www-form-urlencoded

Method:
post
Make sure the Action field includes the full https:// URL.
Step 5: Match the Webstudio Field Names
Use these input names in Webstudio:
| Field | Input Name |
|---|---|
| First Name | First Name |
| Last Name | Last Name |
| Phone Number | Phone Number |
| Message | Message |
| Hidden Form Label | Form |
Add a hidden input named:
Form
Set its value to the form name.
Example:
Quote Request Form
This lets the email subject say:
New Quote Request Form Submission - First Last
Optional: Add a Honeypot Spam Field
Add a text input field and name it:
website
Set the input type to:
hidden
If a bot fills this hidden field, the Worker returns success but does not send an email.
This is optional, but useful for reducing basic spam.
Step 6: Test the Form
Use this order:
1. Confirm Resend DNS records are verified.
2. Confirm RESEND_API_KEY is added as a Cloudflare Worker secret.
3. Save and deploy the Worker.
4. Add the Worker URL to the Webstudio Webhook Form action.
5. Publish the Webstudio site.
6. Open the live published page.
7. Submit a test form.
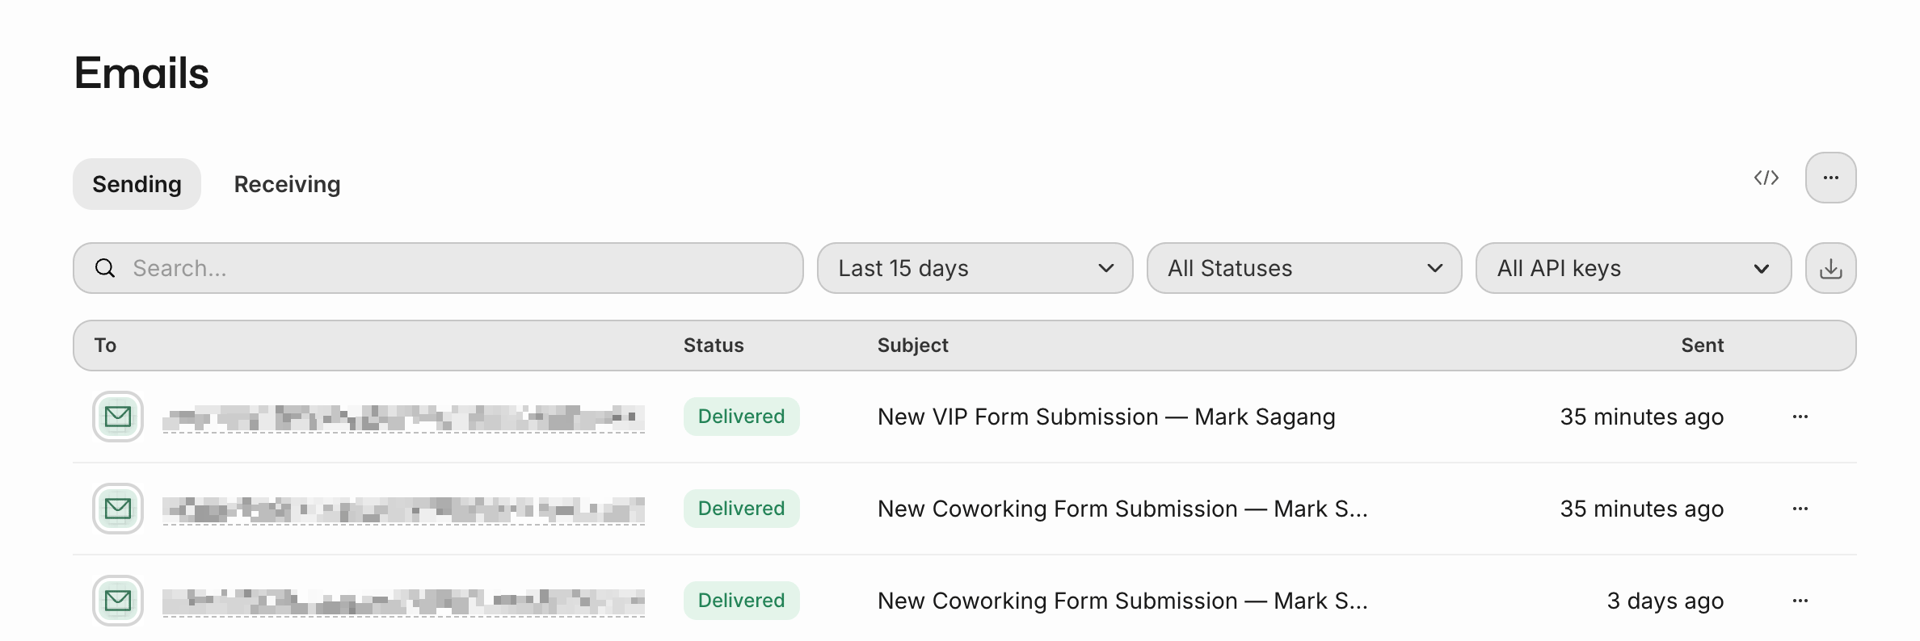
8. Check the test recipient inbox.
Test on the live published site, not only inside the Webstudio builder preview.
Expected Email Result
The email should look like this:
From:
Website Forms <[email protected]>

To:
[email protected]

Reply-To:
[email protected]

Subject:
New Quote Request Form Submission - First Last
The visitor’s email should be used as the Reply-To address, not the sender address. This helps with deliverability while still allowing the recipient to click reply.
Quick Troubleshooting
| Issue | Likely Cause | Fix |
|---|---|---|
| No email arrives | Resend domain not verified | Check Resend domain status |
| Worker returns 500 | Missing or wrong RESEND_API_KEY | Re-add the Worker secret |
| Field values are missing | Webstudio input names do not match | Use the exact field names above |
| Reply does not go to visitor | Email input name is wrong | Use Email exactly |
| CORS error | Live site URL is missing from SITE_ORIGINS | Add the correct site URL |
| Works in preview but not live | Site was not republished | Publish the site again |
To debug, open Cloudflare Worker logs:
Cloudflare Dashboard
→ Workers & Pages
→ Your Worker
→ Logs
→ Start live logs
Then submit the form again.
Final Setup
Once testing works, change the test recipient:
const TO_EMAILS = ["[email protected]"];
To the final inbox or inboxes:
const TO_EMAILS = ["[email protected]", "[email protected]"];
Then save and deploy the Worker again.
Final flow:
Webstudio Webhook Form
→ Cloudflare Worker
→ Resend
→ One or multiple target inboxes
This gives you custom form routing and email formatting without changing your main email receiving setup.
Let's get started
Your brand deserves more than a template. Let's create a custom digital experience that speaks to your audience.